To turn the system on press and hold anywhere on the touch panel's home screen pictured below:
Then select the source you want to send to the screens from the bottom row of options:
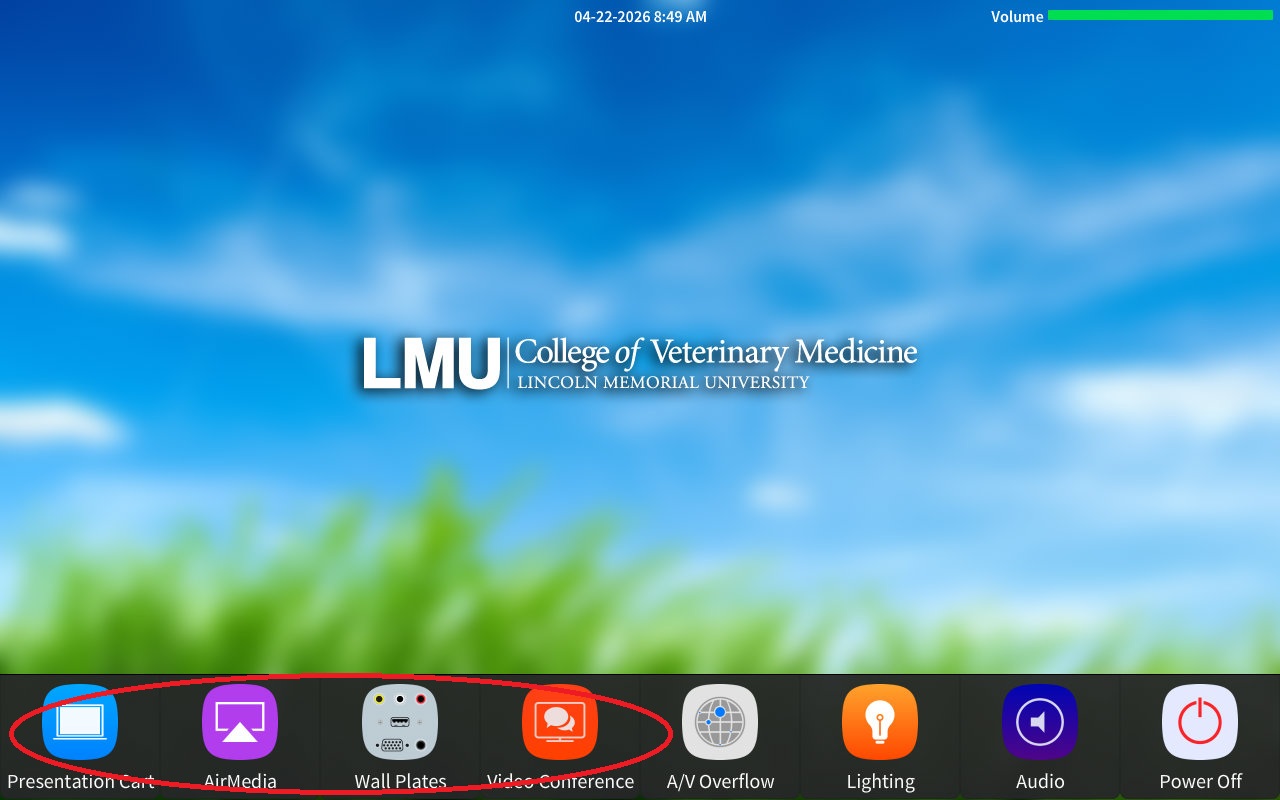
Select "Presentation Cart" to send to route one of the Preston cart sources to the screens. From the cart itself yo can select between the classrooms laptop and the surgery camera.
Select "AirMedia" to send a device image wirelessly. Then follow the on screen instructions
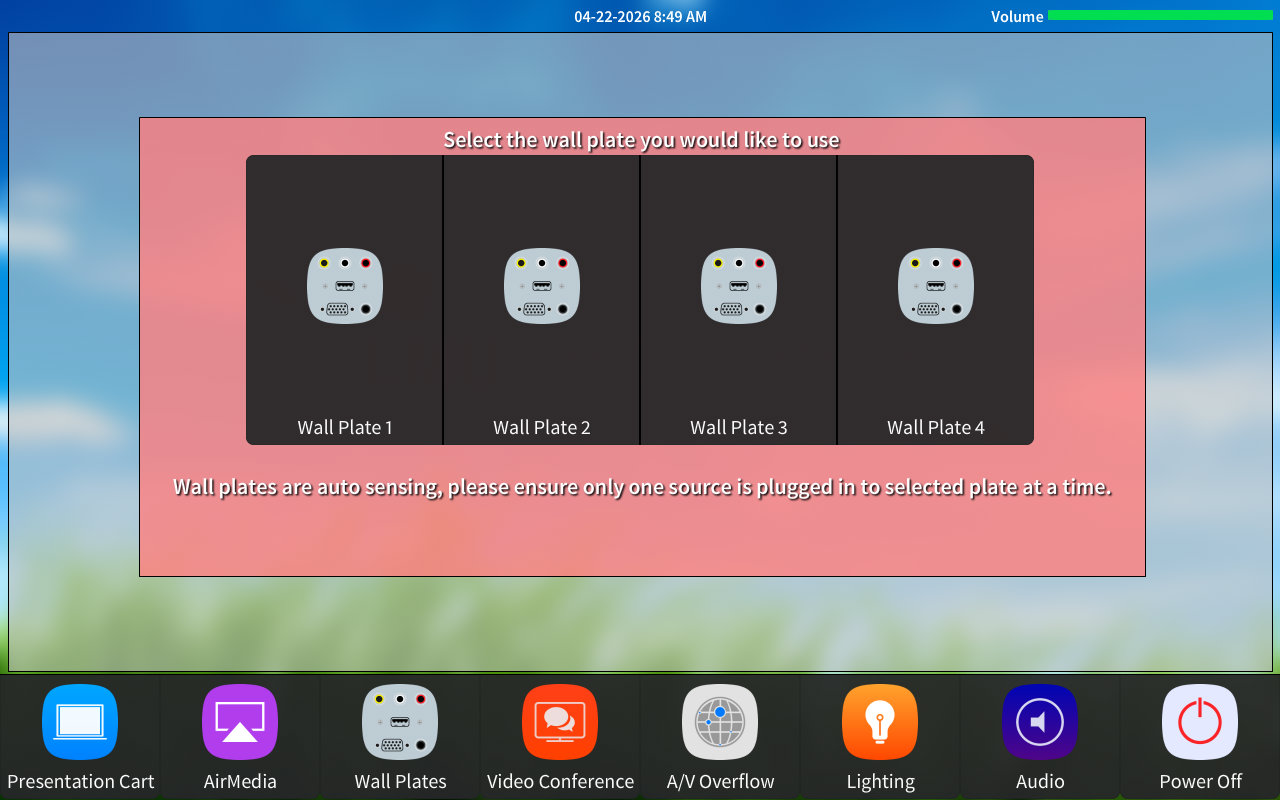
Select "Wallplates" if you want to connect a device to one of the four provided wall plates in the room via an HDMI cable. The wall plates options will show you the screen below where you will need to chose the wallpate you plugged an HDMI cable into in order to get it to route to the screens:
You can adjust audio leveling the room by selecting the purple Audio icon shown below. One you select it the green audio bar will appear. Press the "+" or "-" in order to increase or decrease the columned to the room.
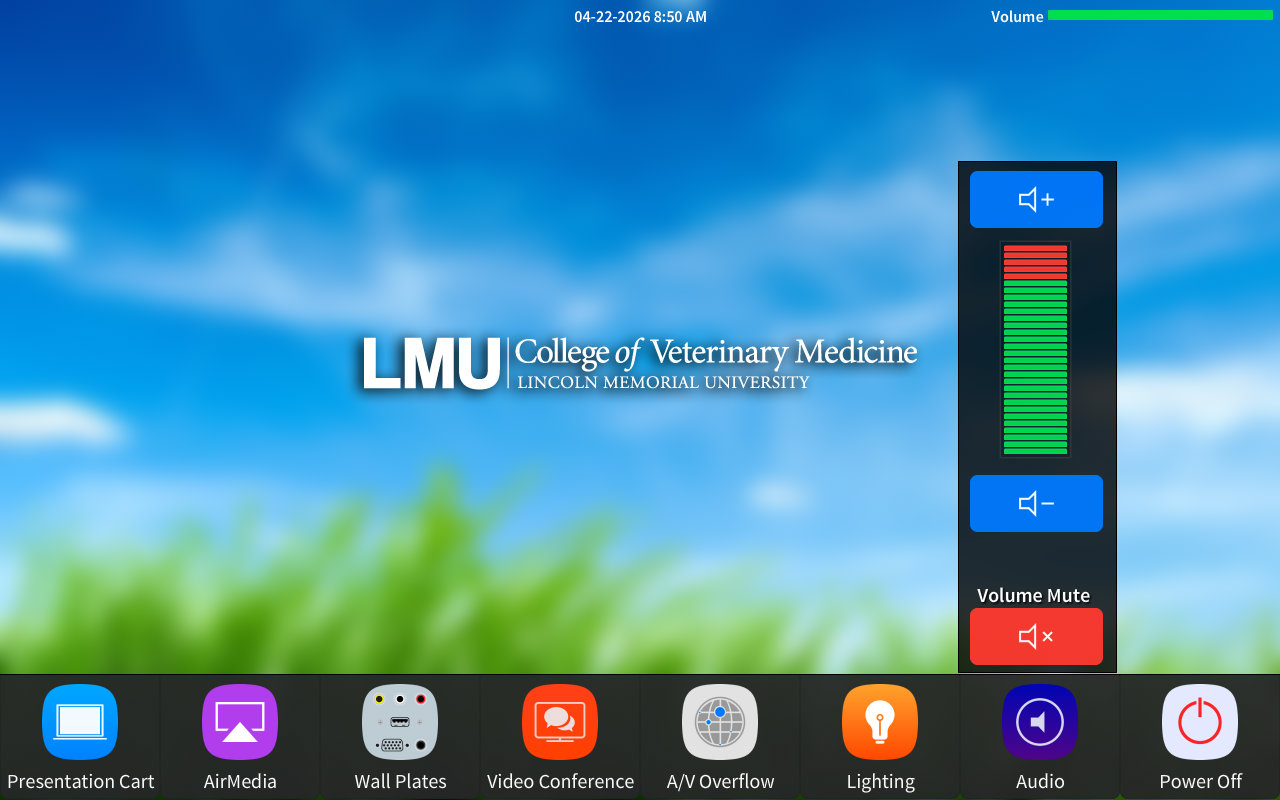
Once selected. This will take you to a page where all the audio options for the room will be listed. You can turn the corresponding volume up or down denuding on your needs. Please not the volume controls will be different for each room as each room as different technology. An Example is below:
***Please note for Zoom Capable rooms the following instructions also apply*
Select the orange "Video Conference" button on the bottom of the screen to start a video conference call. It will show you the screen below.
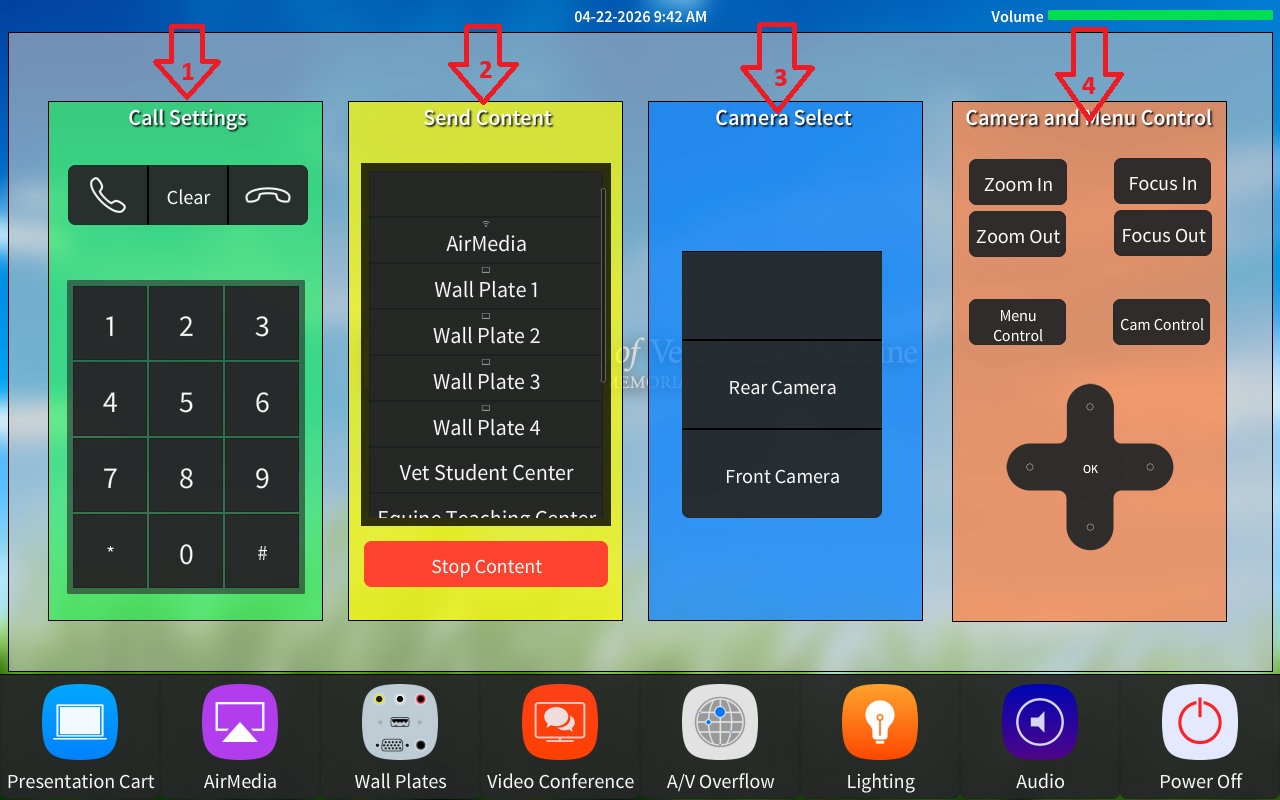
1) Use the daily pad in section one to call out to Zoom. Simply input:
206.247.11.121
Then press the call button. Once it connects enter the meeting ID for your meeting.
Please note the meeting ID is specific to each meeting. This will be generated when the Zoom meeting is created
2) Section two allows you to select any of the content sources in the room to send to Zoom. Just select the desired source if you would like the people in the Zoom meeting to see it.
3) This area allows you to select the camera you want to send to zoom. Choose from the tw options.
4) The last area allows you to control whichever camera is currently selected. You can tilt it or zoom in.out.
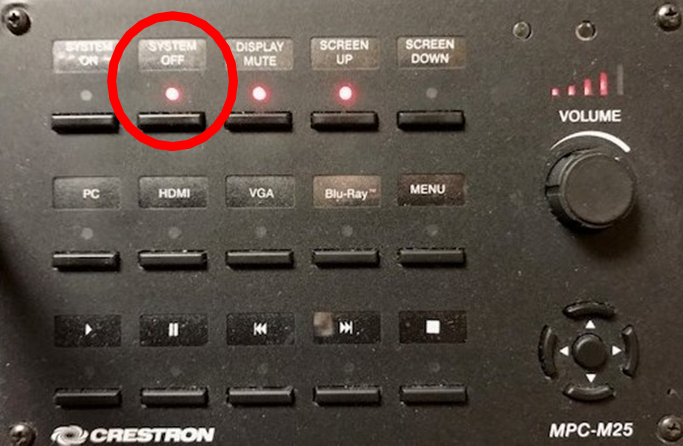
To use the podium, use the button panel located on the podium. Press System On, and the projectors will power on and the screen(s) will lower.

Press the PC button to send the podium PC to the monitors.

To connect a laptop, plug the cables in the podium and press the HDMI or VGA button on the panel.

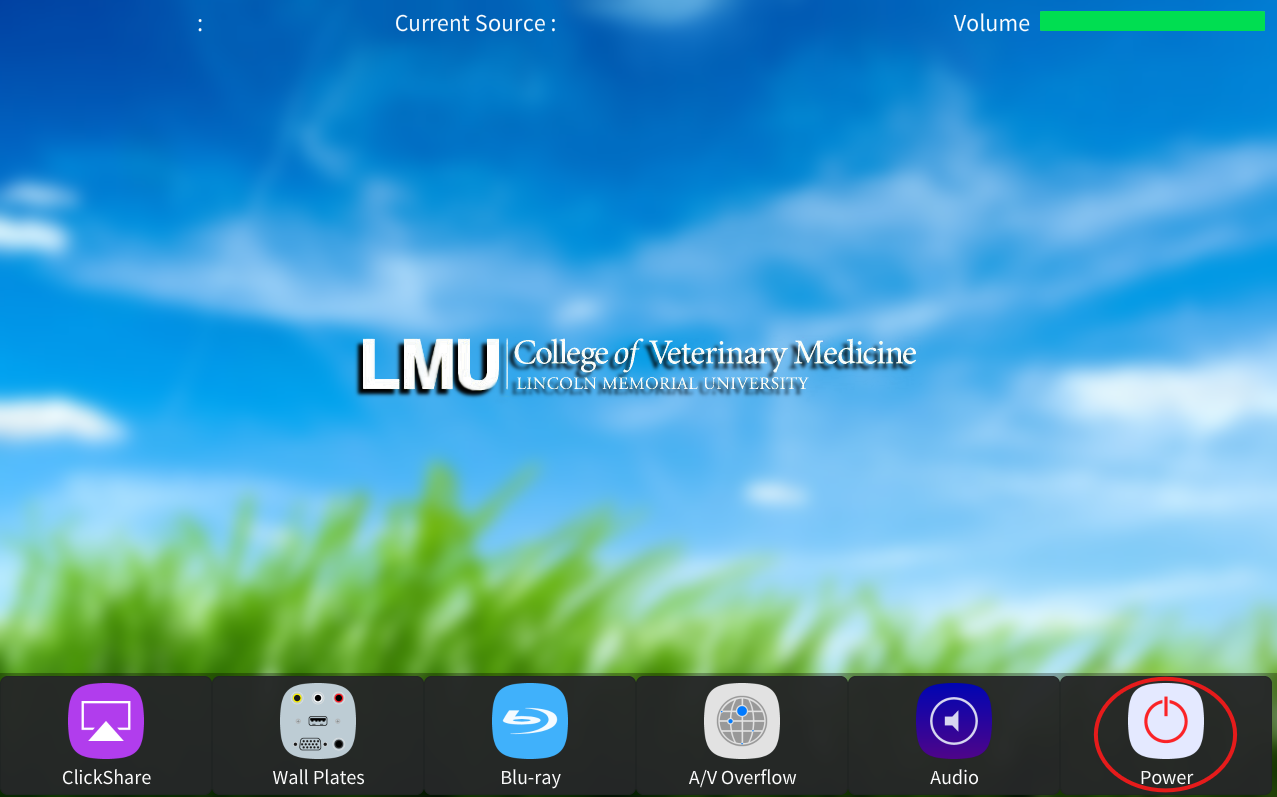
To turn the system off press the System Off button on the panel.
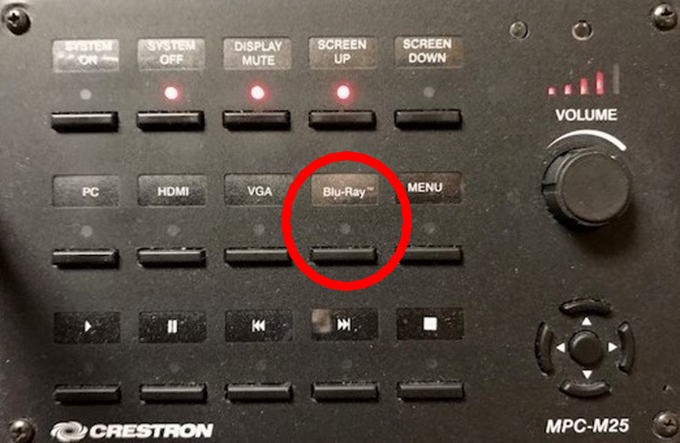
To use the Blu-Ray player, press the Blu-Ray button on the panel.
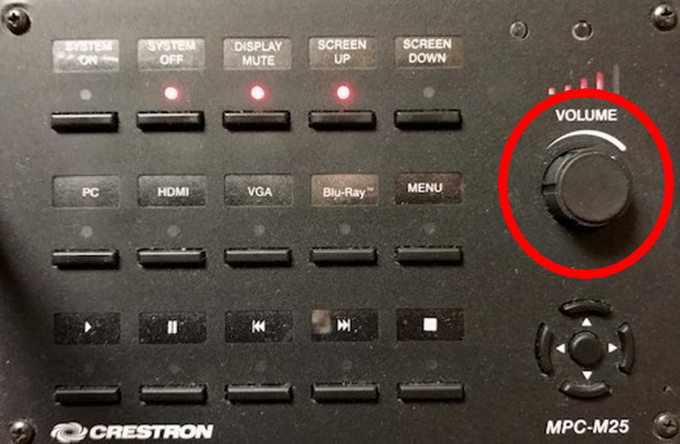
Use the volume knob to adjust the volume.
To turn the system on press and hold anywhere on the touch panel's home screen pictured below:

Then select the source you want to send to the screens from the bottom row of options:
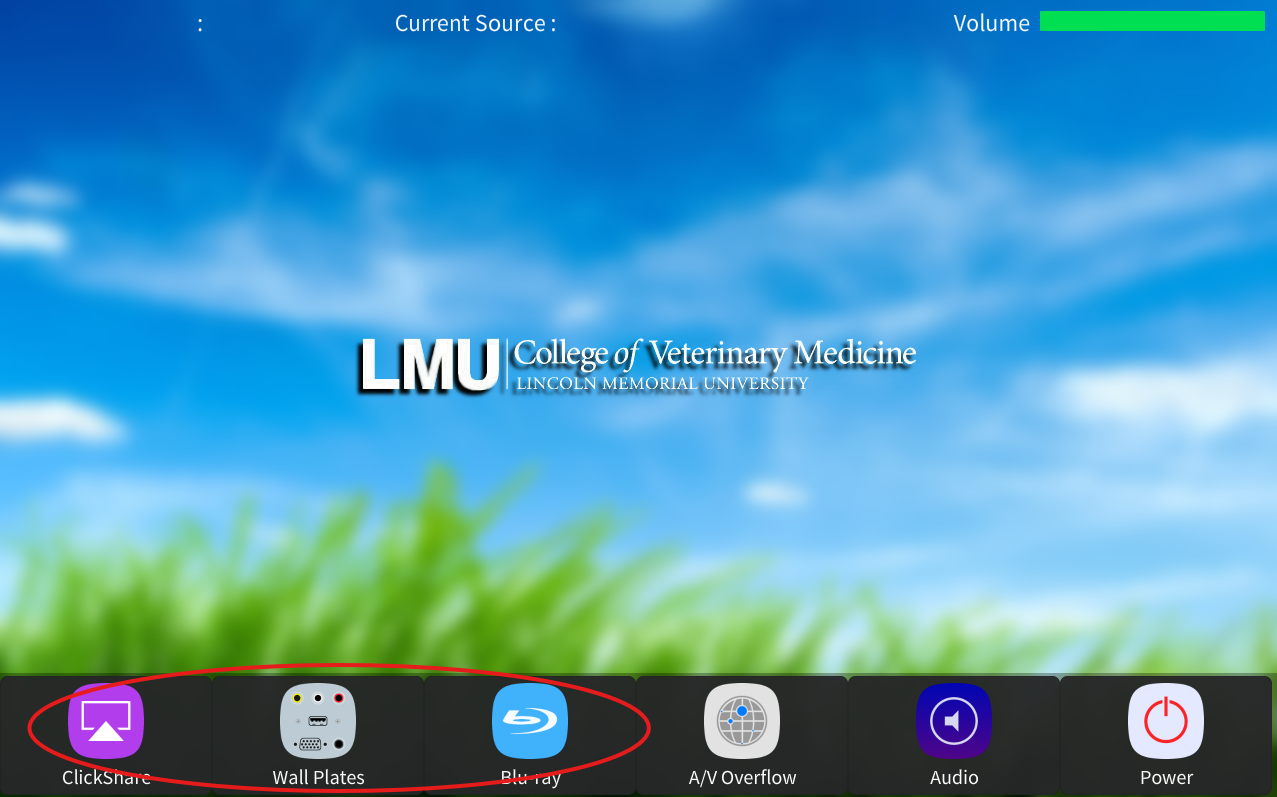
Select "Clickshare" to connect the laptop on the cart using the Clicksahre unit.
Select "Wall Plates" to then send one of the four wallplates in the room to the screen. Please not you will need an HDMI cable to connect your device to the wallplates.
Select "DVD" to route the DVD player to the screen. The DVD player is located in the podium in the room. Please please in DVDS in it.
***Once you have selected one of the source a pop-up will appear on the far right side of the touch panel asking you which displays to send the source to. You may select one single unit or all of the units. An example of the pop-up is below:

You can also adjust audio levels or mute mic by selecting the purple Audio icon shown below:
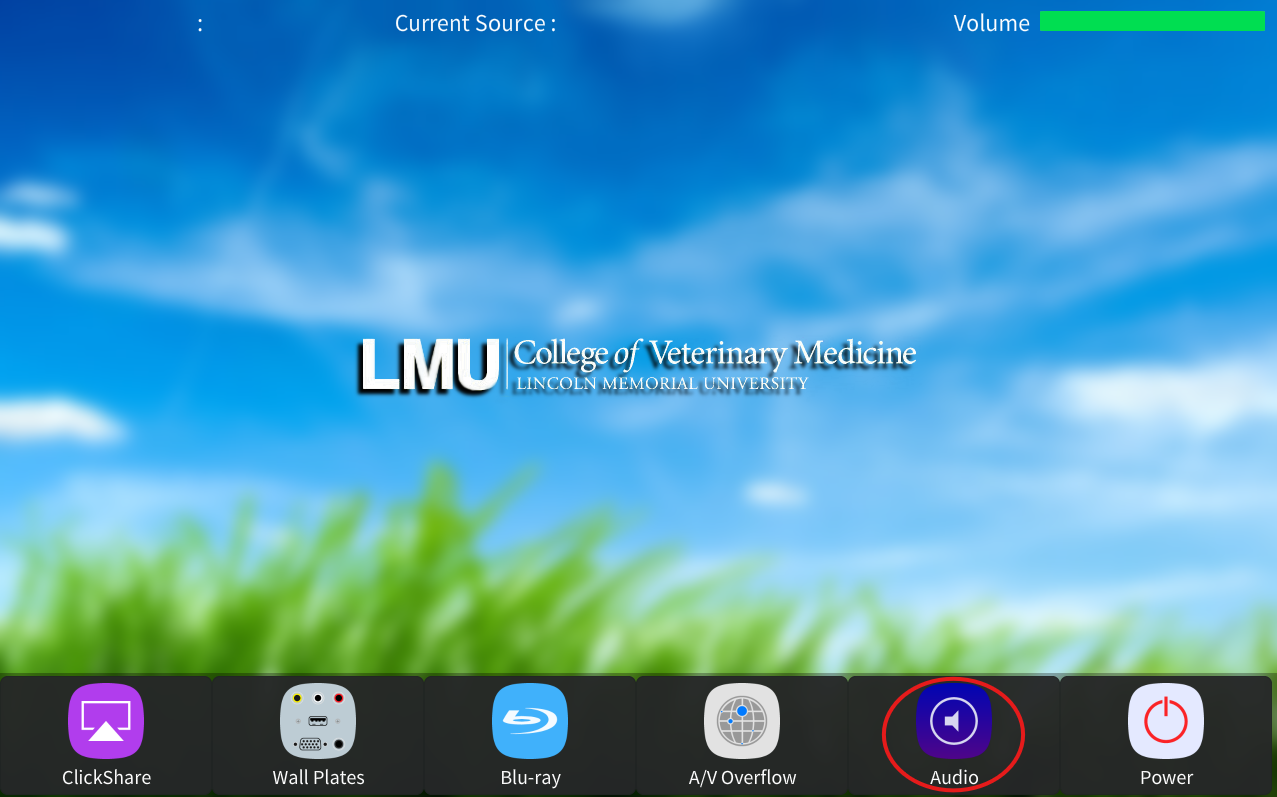
Once selected. This will take you to a page where all the audio options for the room will be listed. You can turn the corresponding volume up or down denuding on your needs. Please not the volume controls will be different for each room as each room has different technology. An example is below:

To turn the system on press and hold anywhere on the touch panel's home screen pictured below:

Then select the source you want to send to the screens from the bottom row of options:

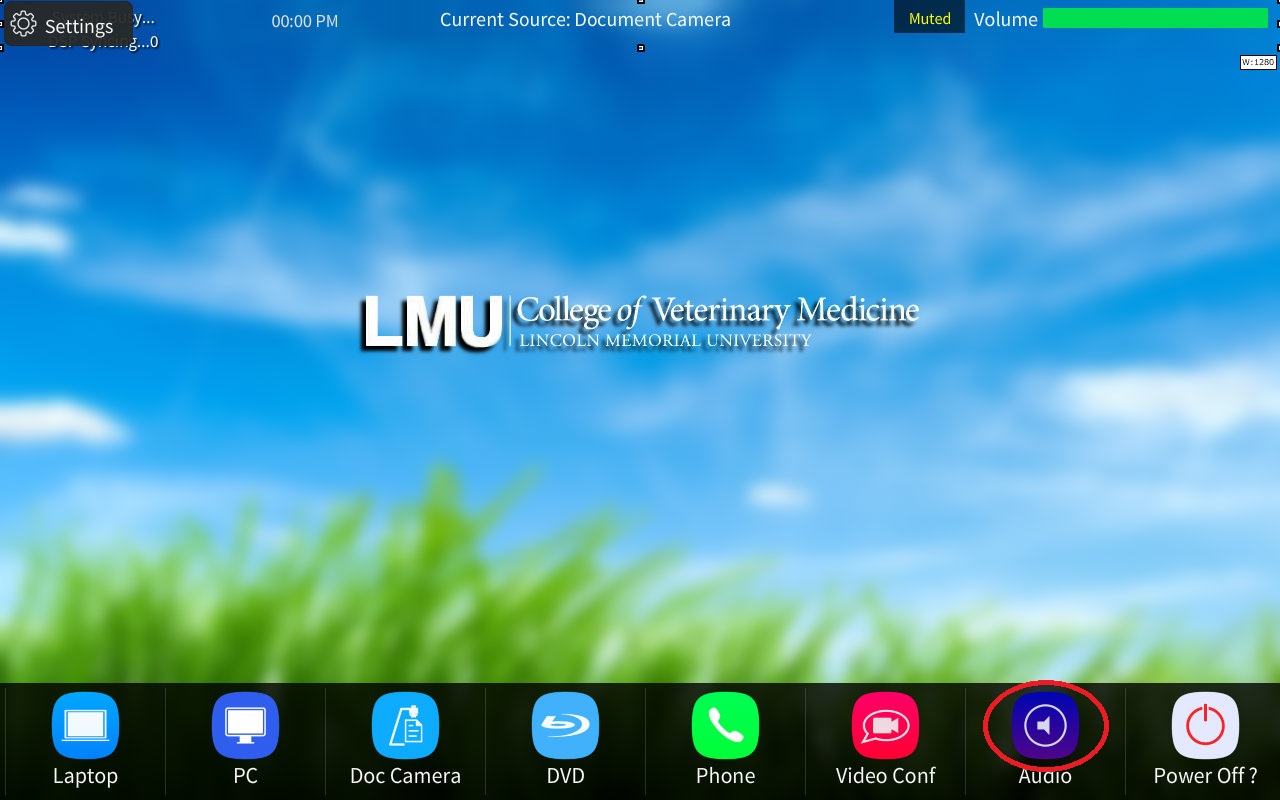
Select "Laptop" to connect a Laptop to the provide wired connection on the podium.
Select "PC" to send the Podiums provided computer.
Select "Doc Cam" to route the Doc Camera l located in a drawer on the left side of the podium.
Select "AirMedia" to send a device image wirelessly. Then follow the on screen instructions
Select "DVD" to route the DVD player to the screen. The DVD player is located in the podium in the room. Please please in DVDS in it.
You can adjust audio levels or mute mic by selecting the purple Audio icon shown below:
Once selected. This will take you to a page where all the audio options for the room will be listed. You can turn the corresponding volume up or down denuding on your needs. Please not the volume controls will be different for each room as each room has different technology. An example is below:
You can also make a phone call from the classroom system in SA 100 using the green phone icon. It will take you to the screen below:

1) Is where you will enter the phone number you would like to call. Use the provided dial paid to enter the number.
2) Once you have finished entering the number press the "Call" button. The room will begin to call the phone number entered.
3) If you need to increase or decrease the volume of the person you called then use the volume tab on the left hand side.
***Please note Zoom Instructions for DSOL SA 100 are below***
By pressing the Red Video Conference icon you will be taking to the Video Conferencing page.

The Video Conference page will look like the page below:
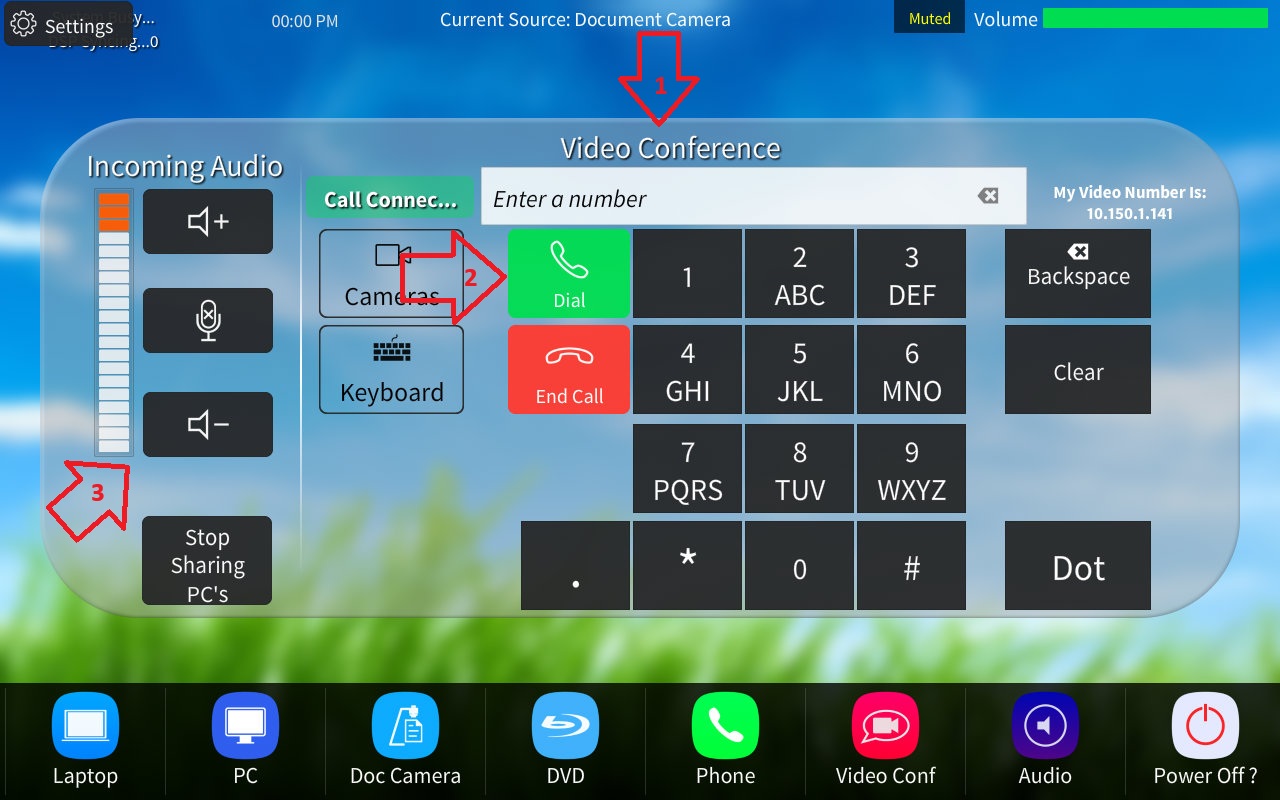
1)In the space designated as section 1 you will enter the Zoom IP: 206.247.11.121. Enter this using the dial pad and then press the green call button too call out to Zoom.
2) Is the green call button. Needed to connect a call. Below it is a red call button used to hangup a call.
3) The volume control in section three is used to control the column of the far end caller only.
To turn the system on press and hold anywhere on the touch panel's home screen pictured below:
Then select the source you want to send to the screens from the bottom row of options:

Select "Laptop" to connect a Laptop to the provide wired connection on the podium.
Select "PC" to send the Podiums provided computer.
Select "Doc Cam" to route the Doc Camera l located in a drawer on the left side of the podium.
Select "AirMedia" to send a device image wirelessly. Then follow the on screen instructions
Select "DVD" to route the DVD player to the screen. The DVD player is located in the podium in the room. Please please in DVDS in it.
You can adjust audio levels or mute mic by selecting the purple Audio icon shown below:

Once selected. This will take you to a page where all the audio options for the room will be listed. You can turn the corresponding volume up or down denuding on your needs. Please not the volume controls will be different for each room as each room has different technology. An example is below:
You can also make a phone call from the classroom system in SA 100 using the green phone icon. It will take you to the screen below:
1) Is where you will enter the phone number you would like to call. Use the provided dial paid to enter the number.
2) Once you have finished entering the number press the "Call" button. The room will begin to call the phone number entered.
3) If you need to increase or decrease the volume of the person you called then use the volume tab on the left hand side.
***Please note the following instructions apply to Zoom Capable Rooms*
Press the Blue Zoom Button.
Once you are in a meeting you will be presented with the following screen:

1) By pressing this button you share the rooms computer to Zoom. Allowing the far-end to see what is on your computer.
2) The "Audio" and "Video" buttons can mute audio and camera signals to Zoom.
3) The "Camera Control" button will take you to a screen where you can control the in room camera.
4) This is a volume meter. It will ONLY control the volume of how loud the far-end zoom participants sound in the room.
5) To leave or end the meeting press the big red "x".
6) Additional meeting info can be found in the top left corner by pressing the green shield icon.
When starting the room system in an "Active Learning" room you will be presented with two opinions.
Classroom Mode: Functions as a normal classroom. Please see the CVM Classroom instructions for more details.
Active Learning Mode: Allows for ever screen in the room to receive a different video signal. This is great for break out rooms nad group activities.
To use the "Active Learning Mode" select the corresponding button below from the touch panels splash screen.

PC and Laptop will function as normally in this mode. However, when pressing "AirMedia" it will route a different AirMedia to each screen to allow for break out sessions. In addition if you wanted to temporarily route one of the AirMedias to all of the TVs to display a particle groups work to everyone you could select the corresponding TVs AirMedia.
